Upgrade Continuous Deployment Pipeline to Xcode 9
Continuous delivery with Flutter
- CI/CD Options
- All-in-one options with built-in Flutter functionality
- Integrating fastlane with existing workflows
- fastlane
- Local setup
- Running deployment locally
- Cloud build and deploy setup
- Xcode Cloud
- Requirements
- Custom build script
- Post-clone script
- Workflow configuration
- Branch changes
- Next build number
Follow continuous delivery best practices with Flutter to make sure your application is delivered to your beta testers and validated on a frequent basis without resorting to manual workflows.
CI/CD Options
There are a number of continuous integration (CI) and continuous delivery (CD) options available to help automate the delivery of your application.
All-in-one options with built-in Flutter functionality
- Codemagic
- Bitrise
- Appcircle
Integrating fastlane with existing workflows
You can use fastlane with the following tooling:
- GitHub Actions
- Example: Flutter Gallery's Github Actions workflows
- Example: Github Action in Flutter Project
- Cirrus
- Travis
- GitLab
- CircleCI
- Building and deploying Flutter apps with Fastlane
This guide shows how to set up fastlane and then integrate it with your existing testing and continuous integration (CI) workflows. For more information, see "Integrating fastlane with existing workflow".
fastlane
fastlane is an open-source tool suite to automate releases and deployments for your app.
Local setup
It's recommended that you test the build and deployment process locally before migrating to a cloud-based system. You could also choose to perform continuous delivery from a local machine.
- Install fastlane
gem install fastlaneorbrew install fastlane. Visit the fastlane docs for more info. - Create an environment variable named
FLUTTER_ROOT, and set it to the root directory of your Flutter SDK. (This is required for the scripts that deploy for iOS.) - Create your Flutter project, and when ready, make sure that your project builds via
- Initialize the fastlane projects for each platform.
- Edit the
Appfiles to ensure they have adequate metadata for your app. - Set up your local login credentials for the stores.
- Set up code signing.
- Create a
Fastfilescript for each platform.-
 On Android, follow the fastlane Android beta deployment guide. Your edit could be as simple as adding a
 lanethat callsupload_to_play_store. Set theaabargument to../build/app/outputs/bundle/release/app-release.aabto use the app bundleflutter buildalready built. -
 On iOS, follow the fastlane iOS beta deployment guide. You can specify the archive path to avoid rebuilding the project. For example:
build_app ( skip_build_archive: true , archive_path: "../build/ios/archive/Runner.xcarchive" , ) upload_to_testflight
-
You're now ready to perform deployments locally or migrate the deployment process to a continuous integration (CI) system.
Running deployment locally
- Build the release mode app.
- Run the Fastfile script on each platform.
Cloud build and deploy setup
First, follow the local setup section described in 'Local setup' to make sure the process works before migrating onto a cloud system like Travis.
The main thing to consider is that since cloud instances are ephemeral and untrusted, you won't be leaving your credentials like your Play Store service account JSON or your iTunes distribution certificate on the server.
Continuous Integration (CI) systems generally support encrypted environment variables to store private data. You can pass these environment variables using --dart-define MY_VAR=MY_VALUE while building the app.
Take precaution not to re-echo those variable values back onto the console in your test scripts. Those variables are also not available in pull requests until they're merged to ensure that malicious actors cannot create a pull request that prints these secrets out. Be careful with interactions with these secrets in pull requests that you accept and merge.
- Make login credentials ephemeral.
- It's recommended to use a Gemfile instead of using an indeterministic
gem install fastlaneon the CI system each time to ensure the fastlane dependencies are stable and reproducible between local and cloud machines. However, this step is optional.- In both your
[project]/androidand[project]/iosfolders, create aGemfilecontaining the following content:source "https://rubygems.org" gem "fastlane" - In both directories, run
bundle updateand check bothGemfileandGemfile.lockinto source control. - When running locally, use
bundle exec fastlaneinstead offastlane.
- In both your
- Create the CI test script such as
.travis.ymlor.cirrus.ymlin your repository root.- See fastlane CI documentation for CI specific setup.
- Shard your script to run on both Linux and macOS platforms.
- During the setup phase of the CI task, do the following:
- Ensure Bundler is available using
gem install bundler. - Run
bundle installin[project]/androidor[project]/ios. - Make sure the Flutter SDK is available and set in
PATH. - For Android, ensure the Android SDK is available and the
ANDROID_SDK_ROOTpath is set. - For iOS, you may have to specify a dependency on Xcode (for example
osx_image: xcode9.2).
- Ensure Bundler is available using
- In the script phase of the CI task:
- Run
flutter build appbundleorflutter build ios --release --no-codesign, depending on the platform. -
cd androidorcd ios -
bundle exec fastlane [name of the lane]
- Run
Xcode Cloud
Xcode Cloud is a continuous integration and delivery service for building, testing, and distributing apps and frameworks for Apple platforms.
Requirements
- Xcode 13.4.1 or higher.
- Be enrolled in the Apple Developer Program.
Custom build script
Xcode Cloud recognizes custom build scripts that can be used to perform additional tasks at a designated time. It also includes a set of predefined environment variables, such as $CI_WORKSPACE, which is the location of your cloned repository.
Post-clone script
Leverage the post-clone custom build script that runs after Xcode Cloud clones your Git repository using the following instructions:
Create a file at ios/ci_scripts/ci_post_clone.sh and add the content below.
#!/bin/sh # The default execution directory of this script is the ci_scripts directory. cd $CI_WORKSPACE # change working directory to the root of your cloned repo. # Install Flutter using git. git clone https://github.com/flutter/flutter.git --depth 1 -b stable $HOME/flutter export PATH="$PATH:$HOME/flutter/bin" # Install Flutter artifacts for iOS (--ios), or macOS (--macos) platforms. flutter precache --ios # Install Flutter dependencies. flutter pub get # Install CocoaPods using Homebrew. HOMEBREW_NO_AUTO_UPDATE=1 # disable homebrew's automatic updates. brew install cocoapods # Install CocoaPods dependencies. cd ios && pod install # run `pod install` in the `ios` directory. exit 0 This file should be added to your git repository and marked as executable.
$ git add --chmod =+x ios/ci_scripts/ci_post_clone.sh Workflow configuration
An Xcode Cloud workflow defines the steps performed in the CI/CD process when your workflow is triggered.
To create a new workflow in Xcode, use the following instructions:
-
Choose Product > Xcode Cloud > Create Workflow to open the Create Workflow sheet.
-
Select the product (app) that the workflow should be attached to, then click the Next button.
-
The next sheet displays an overview of the default workflow provided by Xcode, and can be customized by clicking the Edit Workflow button.
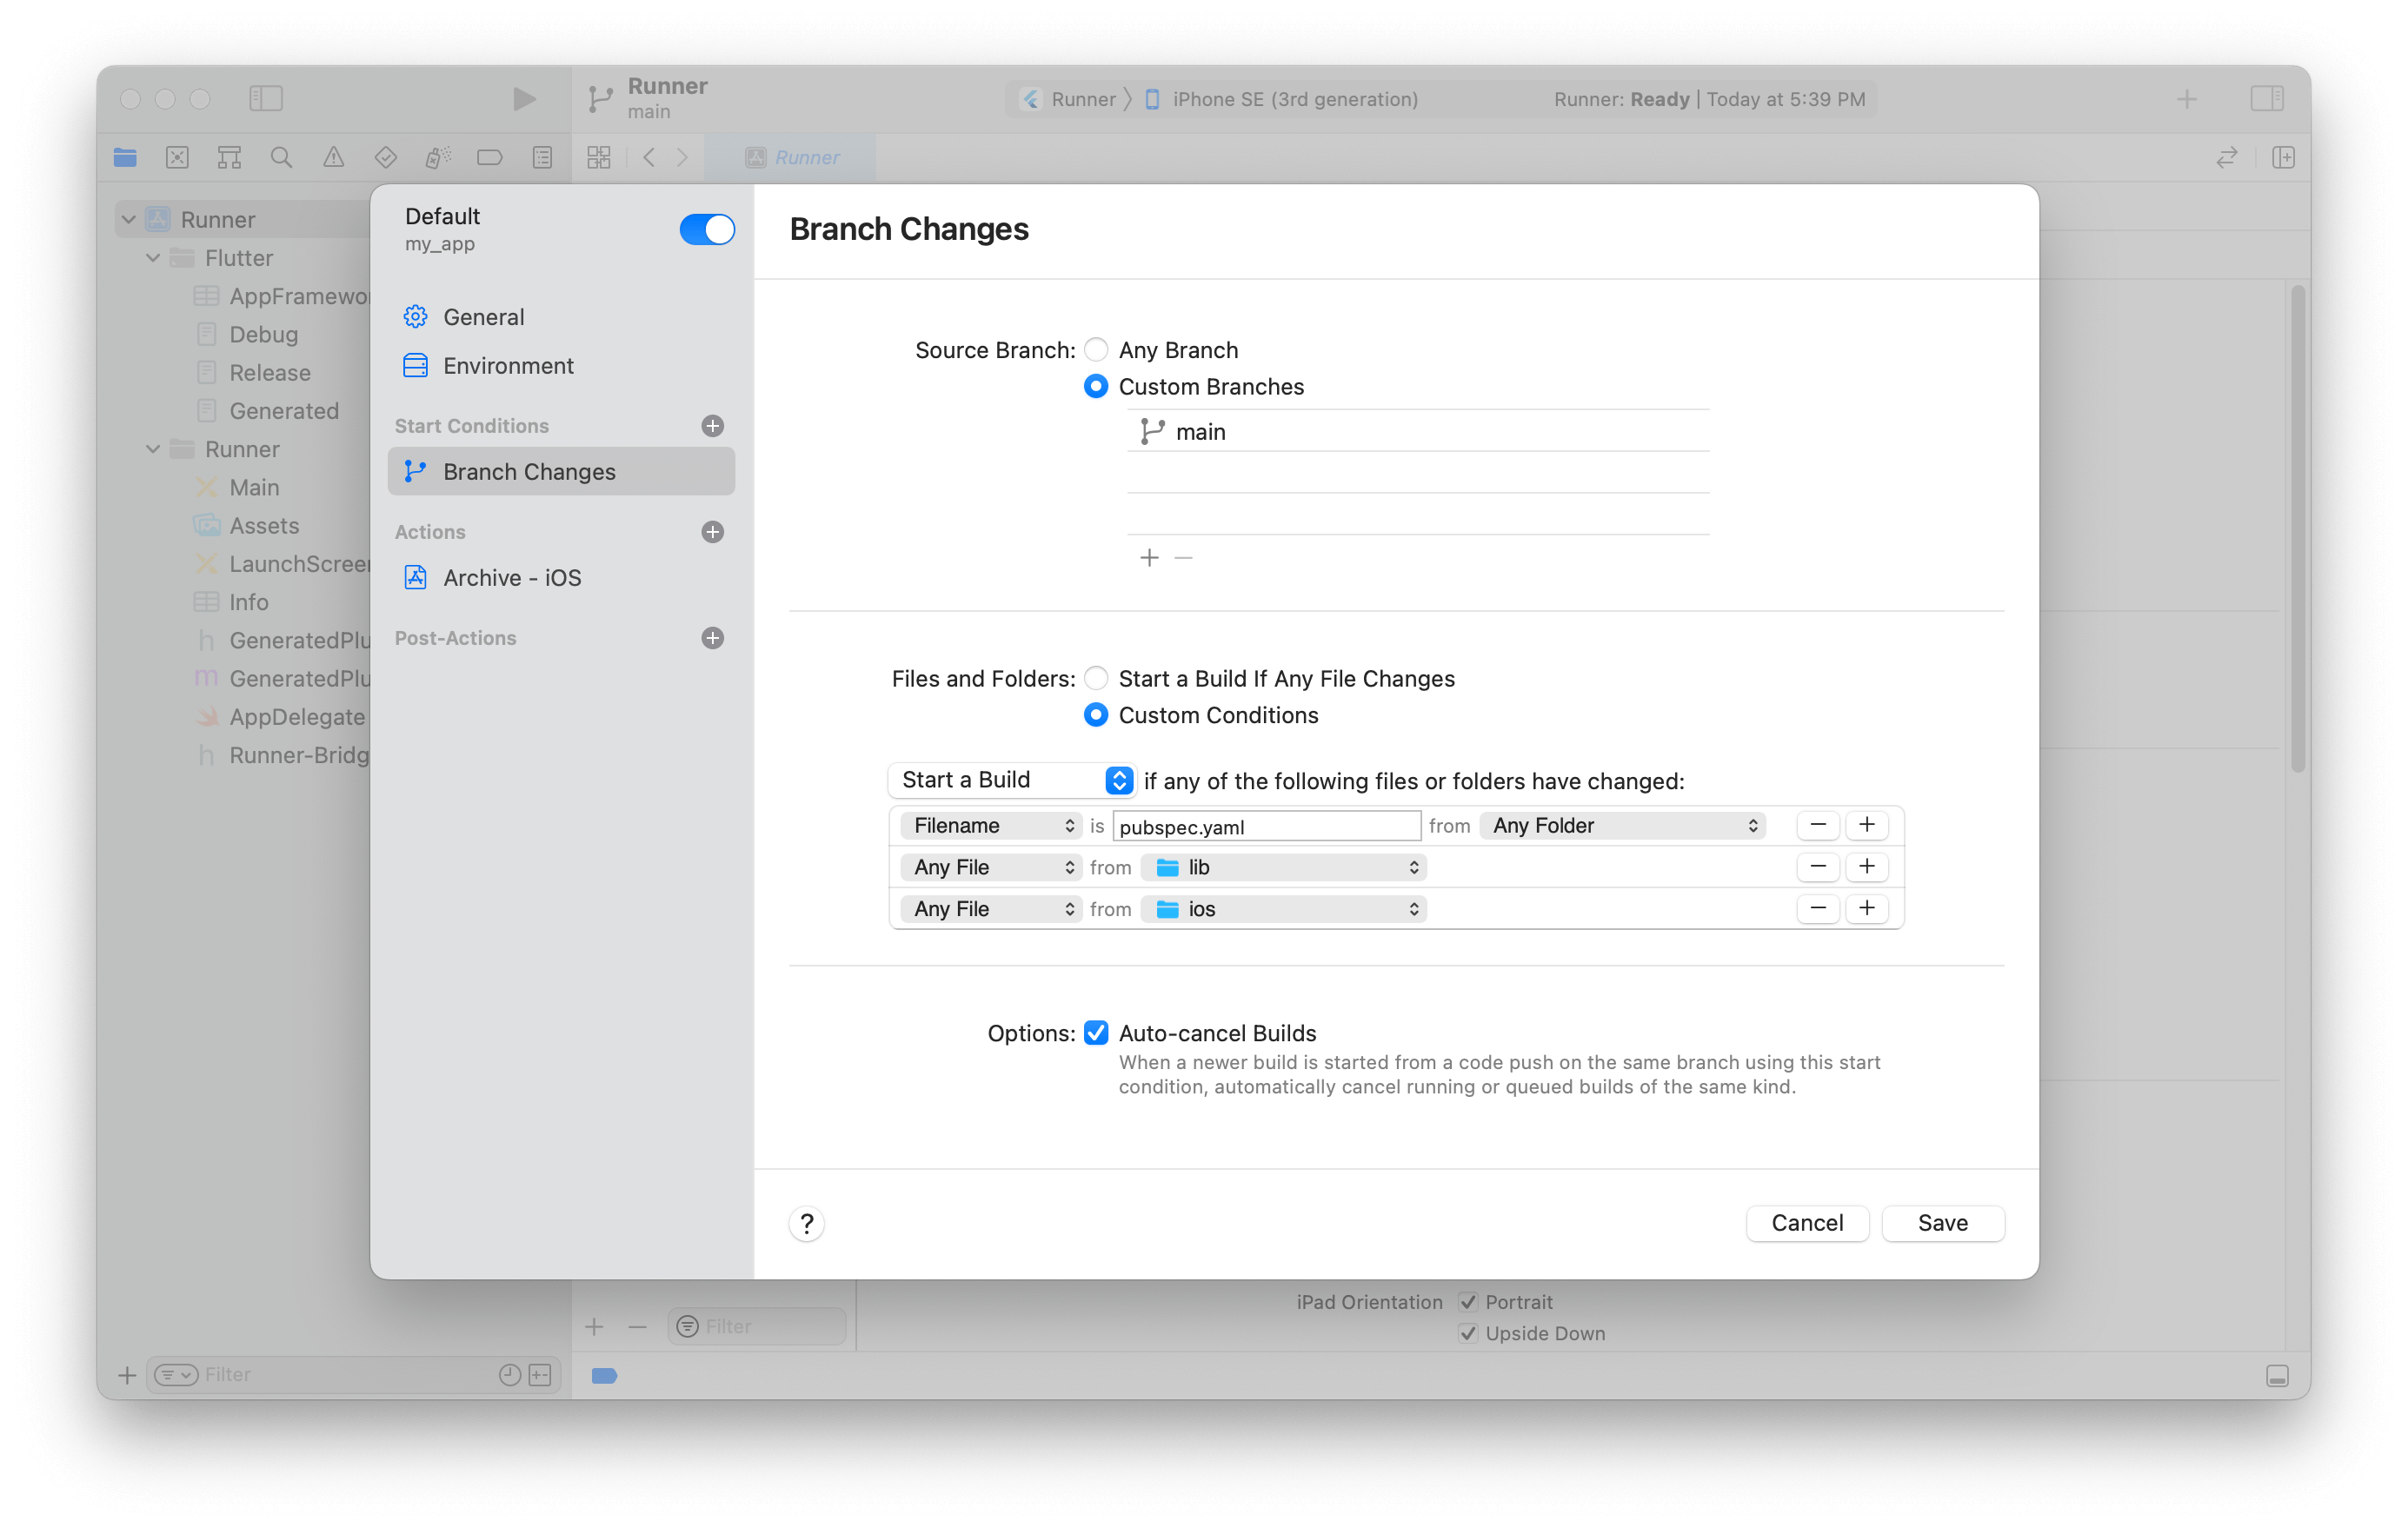
Branch changes
By default Xcode suggests the Branch Changes condition that starts a new build for every change to your Git repository's default branch.
For your app's iOS variant, it's reasonable that you would want Xcode Cloud to trigger your workflow after you've made changes to your flutter packages, or modified either the Dart or iOS source files within the lib\ and ios\ directories.
This can be achieved by using the following Files and Folders conditions:
Next build number
Xcode Cloud defaults the build number for new workflows to 1 and increments it per successful build. If you're using an existing app with a higher build number, you'll need to configure Xcode Cloud to use the correct build number for it's builds by simply specifying the Next Build Number in your iteration.
Check out Setting the next build number for Xcode Cloud builds for more information.
Source: https://docs.flutter.dev/deployment/cd
0 Response to "Upgrade Continuous Deployment Pipeline to Xcode 9"
Post a Comment